Heat Treatment 101: A Beginner's Guide for Bladesmiths
Heat treatment is the difference between a blade that holds an edge and one that chips on the first cut. It's the process that transforms soft, workable steel into a hardened tool capable of slicing through rope, carving wood, or preparing food for years.
Many bladesmiths learn the hard way — a beautiful blade with perfect grind lines that simply won't cut. The difference between success and failure often comes down to 50°F and a few minutes of soak time. Heat treatment isn't optional — it's everything.
If you've ever wondered why your blade turned out soft, why it cracked during quenching, or why it won't hold an edge — the answer almost always lies in heat treatment.
This guide covers the essential knowledge for performing successful heat treatments, compiled from metallurgical research and the collective experience of the bladesmithing community.
What Is Heat Treatment and Why Does It Matter?
Heat treatment is a controlled process of heating and cooling steel to alter its physical and mechanical properties. According to ASM International's Heat Treating Guide, proper heat treatment can increase steel hardness by 300-400% while maintaining usable toughness.
For bladesmiths, this means transforming steel from a relatively soft, machinable state into a hardened blade that can take and hold a sharp edge.
Without proper heat treatment, your blade will:
- Fail to hold an edge (too soft)
- Chip or crack during use (too brittle)
- Warp or bend permanently (improper structure)
- Perform inconsistently (uneven hardness)
With proper heat treatment, you get:
- Excellent edge retention
- Appropriate toughness for the blade's purpose
- Predictable, repeatable performance
- A blade you can be proud of
Rule of thumb: If you're spending more than 2 hours on a blade, spend at least 20 minutes getting heat treatment right. The math is simple — bad HT means all that grinding time was wasted.
The Four Stages of Heat Treatment
Every complete heat treatment cycle involves four main stages. Let's walk through each one with specific techniques.

1. Normalizing
Purpose: Relieve internal stresses and refine grain structure.
Normalizing prepares the steel for hardening by creating a uniform, fine-grained structure. As Dr. Larrin Thomas explains on Knife Steel Nerds, normalizing "resets" the steel from stresses introduced during forging and creates optimal conditions for hardening.
Normalizing step-by-step:
- Heat the blade evenly to just above critical temperature (non-magnetic point + 50°F/25°C)
- Hold briefly (30 seconds) to ensure even heat throughout the cross-section
- Remove from heat and let cool in still air until black
- Repeat 2-3 times, reducing temperature slightly each cycle
Pro tip: Many experienced bladesmiths do 4 cycles on forged blades because forging introduces more stress. For stock removal blades, 2-3 cycles is usually sufficient.
Signs of proper normalizing:
- Uniform color when heated (no hot spots)
- No visible grain on the surface after etching
- Blade machines and grinds evenly without hard/soft spots
Common mistake: Skipping normalization entirely. Many cracked blades can be traced back to skipped normalizing — the large grain structure from forging makes steel brittle.
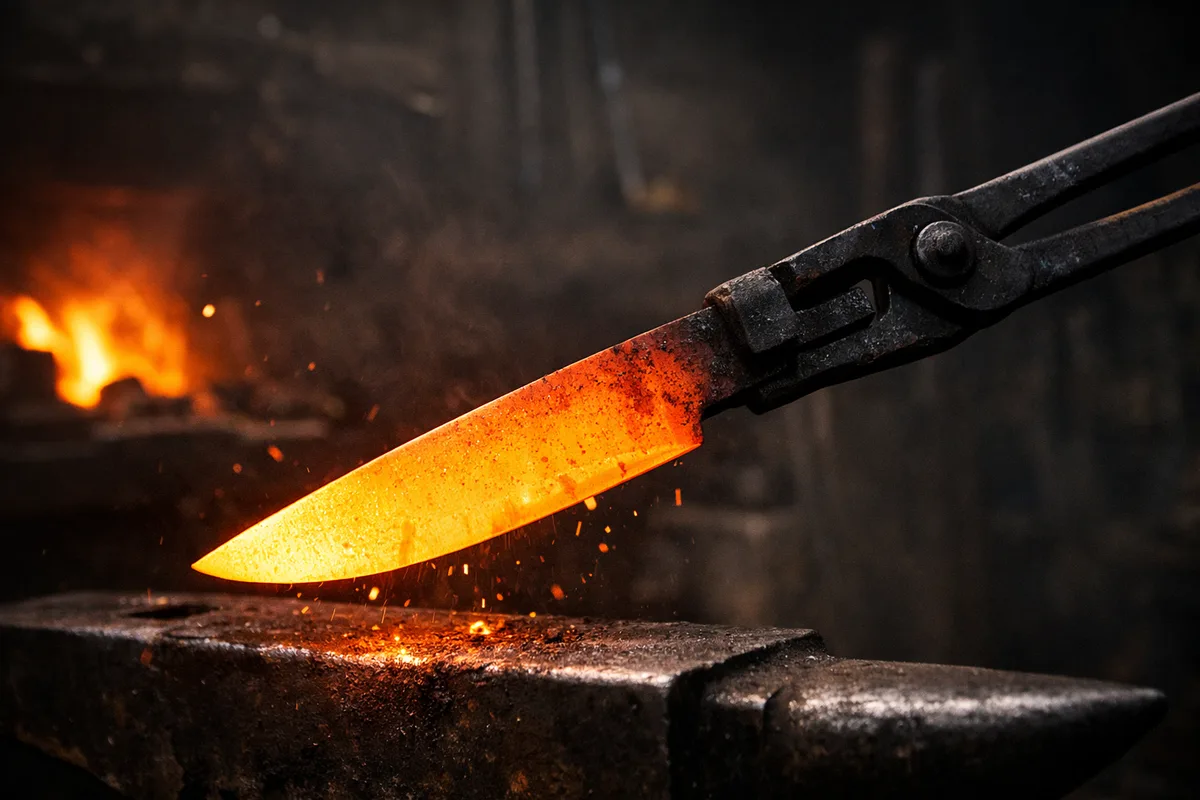
2. Hardening (Austenitizing)
Purpose: Heat steel to transform its crystal structure for hardening.
When steel reaches its critical temperature, its crystal structure changes from ferrite/pearlite to austenite. This transformation — called austenitization — is necessary for the steel to harden during quenching.
How to find critical temperature:
The easiest method is the magnet test. Steel becomes non-magnetic at its critical temperature (called the Curie point). Keep a magnet on a 12" wire handle and touch it to the blade every 30 seconds as it heats.
The magnet test: when the blade stops sticking to the magnet, you've hit critical temperature.
Critical temperatures for common steels:
These temperatures are based on data from Knife Steel Nerds' steel database:
| Steel | Critical Temp | Austenitizing Temp | Soak Time | Source |
|---|---|---|---|---|
| 1084 | 1475°F (800°C) | 1475-1500°F | 10 min | KSN |
| 80CrV2 | 1475°F (800°C) | 1475-1525°F | 10 min | Aldo Bruno |
| 52100 | 1500°F (815°C) | 1500-1550°F | 15 min | KSN |
| O1 | 1450°F (790°C) | 1450-1500°F | 15-20 min | Starrett specs |
| 1095 | 1475°F (800°C) | 1475-1500°F | 10 min | KSN |
⚠️ Important: These are starting points. Your actual temps may vary based on your equipment, steel source, and blade geometry. Always test on scrap first.
Important lesson: Many bladesmiths have ruined batches of blades by trusting inaccurate forge gauges. Calibrate your temperature measurement against a known reference regularly — it's cheap insurance against wasted work.
Common mistakes:
- Overheating: Causes grain growth, making steel brittle and sparkly at the edge
- Underheating: Steel won't fully harden — you'll know because the file bites
- Uneven heating: Results in warping and soft spots
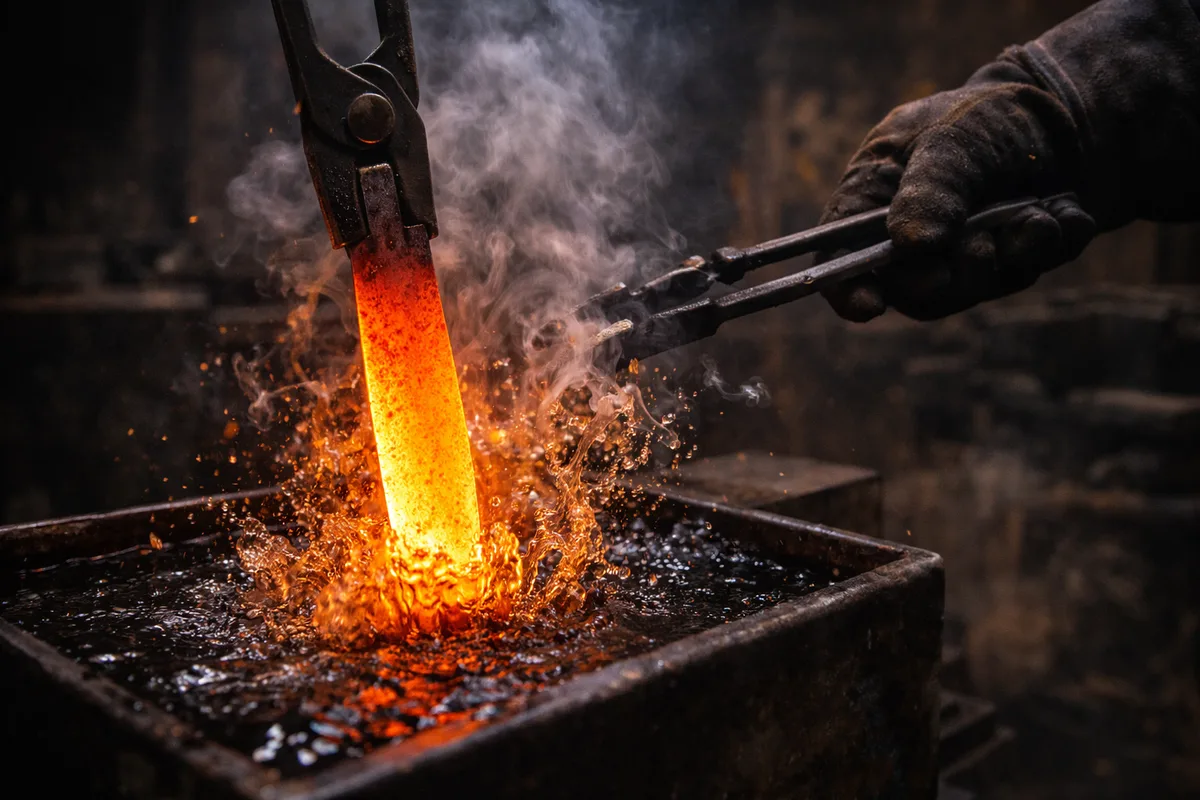
3. Quenching
Purpose: Rapidly cool steel to "freeze" the austenite into martensite (hard steel).
Quenching is the most dramatic — and risky — part of heat treatment. The rapid cooling transforms the steel's crystal structure into martensite, which is hard but brittle.
The moment of truth: edge first, straight down, no hesitation.
Quenching mediums compared:
| Medium | Cooling Speed | Best For | Notes |
|---|---|---|---|
| Water | Very fast | High-carbon (careful!) | Only for specific steels — too aggressive for most |
| Brine | Fastest | Traditional Japanese | High crack risk |
| Parks 50 | Medium-fast | Most carbon steels | Great for 52100, O1 |
| Canola oil | Medium | Beginners, forgiving | Great starting point for new bladesmiths |
| Mineral oil | Medium | Good all-around | Works well, affordable |
Recommended quenching technique:
- Prep the oil: Heat to 120-130°F (50-55°C). A cheap aquarium heater works well.
- Volume matters: At least 2 gallons for a typical knife. The oil temp will spike — more volume = more stable.
- Transfer speed: From forge to quench in under 3 seconds. Practice the motion before heating.
- Entry angle: Edge first, straight down, perfectly vertical
- Agitate: Gentle slicing motion for first 10-15 seconds — this breaks the vapor jacket
- Hold still: After agitation, hold in place for 30+ more seconds
- Full cool: Leave until you can hold the blade comfortably (takes 1-2 minutes)
Critical tip: Watch your blade as it enters the oil. If you see the edge curve toward you (convex up), you're going too slow or the oil is too cold. The spine cools faster and contracts, pulling the edge up. Preheating oil properly dramatically reduces warp rates.
What happens if you mess up:
| Problem | Cause | How to fix |
|---|---|---|
| Blade curves toward edge | Oil too cold OR too slow | Preheat oil, faster transfer |
| Blade curves toward spine | Edge too thin before HT | Leave edge thicker (~1mm) |
| Crack at edge | Quench too aggressive | Try slower oil, or normalize more |
| Didn't harden | Wrong temp OR wrong oil | Verify steel type, check temps |
4. Tempering
Purpose: Reduce brittleness while retaining hardness.
As-quenched steel is extremely hard but also very brittle — blades have been known to shatter just from being dropped on concrete. Tempering reduces brittleness by allowing some of the martensite to transform into a tougher structure.
Tempering process:
- Don't wait: Temper within 1-2 hours of quenching. Longer = higher risk of cracking from internal stress
- Clean first: Wipe off all oil — it smokes in the oven
- Verify oven temp: Kitchen ovens can be inaccurate. Use a separate oven thermometer to calibrate
- Two cycles minimum: The first cycle creates fresh martensite that needs treating
- Time: 2 hours per cycle at temperature
- Cool: Let air cool completely between cycles
Tempering temperatures and expected hardness:
Based on data from Crucible Industries:
| Temperature | Expected HRC | Best For | Notes |
|---|---|---|---|
| 350°F (175°C) | 64-65 | Razors, scalpels | Too hard for most knives — will chip |
| 400°F (205°C) | 61-63 | Kitchen knives, slicers | Good default for kitchen knives |
| 450°F (230°C) | 59-61 | EDC, general purpose | Sweet spot for most users |
| 500°F (260°C) | 57-59 | Hard-use, batoning | More tough, still holds edge well |
| 550°F (290°C) | 55-57 | Axes, machetes | Prioritizes toughness over hardness |
Visual reference — Temper colors:
Before modern thermometers, bladesmiths judged temperature by the oxide colors that form on polished steel. While you should always use a thermometer for accuracy, knowing temper colors helps you catch mistakes and understand your steel.

Recommendation for beginners: Start at 400°F for two 2-hour cycles. It's forgiving — hard enough to cut well, tough enough not to chip if your geometry isn't perfect. Once you're getting consistent results, experiment with 375°F or 425°F to dial in your preference.
Why two temper cycles?
This isn't just tradition — there's real metallurgy behind it. Dr. Larrin Thomas explains that the first temper converts primary martensite but creates fresh martensite from retained austenite. The second cycle tempers this fresh martensite. Skip it and you have untreated hard spots.
Step-by-Step: Your First Heat Treatment
Let's put it all together with 1084 steel — the most beginner-friendly carbon steel and what I recommend for everyone's first heat treatment.
Why 1084?
- Wide margin for error on temperature
- Hardens easily in simple oils
- Cheap and widely available from New Jersey Steel Baron, Alpha Knife Supply
- Performs excellently for its price point
Materials You'll Need
Essentials:
- 1084 blade (leave edge at ~1mm thickness before HT)
- Forge capable of 1500°F+ (propane forge, coal forge, or even a DIY setup)
- Magnet on 12"+ wire or rod
- Quench container (at least 2 gallons capacity)
- Canola oil (start here) or Parks 50
- Kitchen oven with verified temperature
- Long tongs
- Fire-resistant gloves
- Safety glasses
- Fire extinguisher (not optional!)
Recommended:
- Oven thermometer for calibration
- Aquarium heater for oil
- Timer
The Complete Process
Step 1: Normalize (Day 1, ~30 minutes)
Cycle 1: Heat to bright orange (1550°F) → Air cool to black
Cycle 2: Heat to medium orange (1500°F) → Air cool to black
Cycle 3: Heat to dull orange (1475°F) → Air cool to black
After normalizing, your blade should grind evenly with no hard spots.
Step 2: Harden (Day 1, ~20 minutes)
1. Heat oil to 120-130°F
2. Heat blade to critical temp (check with magnet)
3. Add 50°F above non-magnetic point
4. Soak for 10 minutes
5. Quench: edge first, straight down, agitate 10 sec, hold 50 sec
6. Test with file — should skate, not bite
Step 3: Temper Cycle 1 (Day 1, ~2.5 hours)
1. Wipe blade clean
2. Preheat oven to 400°F (verify with thermometer)
3. Place blade in oven
4. Timer: 2 hours
5. Remove, air cool completely
Step 4: Temper Cycle 2 (Day 1 or 2, ~2.5 hours)
1. Same process as Cycle 1
2. After cooling: ready for final grind and sharpening
Testing Your Results
File test: A sharp new file should skate off the edge without biting. If it bites, the blade didn't harden — try again with higher temp or check your steel.
Flex test: In a vise, gently flex the blade (15-20°). It should spring back without permanent bend. If it bends and stays bent → too soft. If it snaps → too brittle (temper at higher temp).
The flex test: spring back = good, permanent bend = too soft, snap = too brittle.
Common Heat Treatment Problems (And How I Fixed Them)
Problem: Blade Didn't Harden
Symptoms: File bites into edge easily
What's actually happening: Steel didn't reach austenite phase, or cooled too slowly to form martensite.
Troubleshooting checklist:
- ✓ Did magnet test confirm non-magnetic? (if no → didn't reach critical temp)
- ✓ Was transfer time under 3 seconds? (if no → lost too much heat)
- ✓ Was oil at 120°F+? (cold oil = slower cooling)
- ✓ Are you sure it's the steel you think it is? (unmarked steel from scrapyard is a gamble)
Common scenario: A blade that absolutely won't harden often turns out to be mis-labeled steel — "1084" that's actually 4140 (a low-carbon steel that barely hardens). This happens when buying unmarked steel at flea markets or scrapyards. Lesson: always buy from reputable suppliers like NJSB or Alpha where steel is certified.
Problem: Blade Cracked
Symptoms: Visible crack, usually at the edge or where geometry changes
Root causes:
- Quench too aggressive for the steel
- Uneven thickness (thin spots cool faster = stress)
- Sharp inside corners (stress concentrators)
- Cold quench oil
- Waited too long to temper
How to prevent cracks:
- Leave edge 1mm+ thick before HT
- Radius all inside corners to at least 1/16"
- Preheat oil to 120-130°F (aquarium heater)
- Temper within 2 hours of quenching
- For crack-prone steels (O1, 52100): temper immediately
Problem: Blade Warped
Symptoms: Blade curves sideways or twists along length
Why it happens: Uneven cooling. One side cools and contracts faster than the other.
Anti-warp protocol:
- Even thickness before HT (within 0.5mm side to side)
- Even heating (rotate blade 90° every 30 seconds in forge)
- Straight entry into quench — draw a line on your quench tank for reference
- For mild warps: straighten during tempering while blade is still 300°F+
Pro tip for warped blades: Keep two flat steel bars machined true. For a warped blade, clamp it between the bars before the first temper. The 400°F heat allows enough movement to straighten while the clamps hold it flat. Works about 80% of the time for minor warps.
Budget Heat Treatment Setup
You don't need expensive equipment. Here's a practical budget setup:
Heat source: Two-burner propane forge (~$350) — or a DIY charcoal forge for ~$40 in parts.
Temperature verification: Magnet on wire for critical temp. For precision work, a Type K thermocouple (~$25 on Amazon).
Quench tank: Modified 5-gallon steel pail with aquarium heater zip-tied inside. Functional and cheap.
Quench oil: Parks 50 for production work, canola oil for beginners and learning.
Tempering: Dedicated toaster oven from a thrift store (~$15) with an oven thermometer to verify. Use a dedicated oven, not the kitchen oven.
Total startup cost: You can do proper heat treatment for under $200 if you're resourceful.
The Most Important Thing: Keep Records
This cannot be stressed enough: Write everything down. Experienced bladesmiths keep detailed notebooks for every blade they heat treat. When a blade turns out perfect, you can reproduce it. When one fails, you can figure out why.
What to record for every heat treatment:
Date: _______________
Steel: ______________ Source: ______________
Blade dimensions: _____ x _____ x _____mm
Edge thickness before HT: _____mm

NORMALIZE
  Cycles: ___
  Temps: ___/___/___°F
  Notes: ________________

HARDEN
  Austenitizing temp: _____°F
  Soak time: _____ min
  Quench medium: __________
  Oil temp: _____°F
  Notes: ________________

TEMPER
  Temp: _____°F
  Time: _____ hrs × _____ cycles
  Notes: ________________

RESULTS
  File test: PASS / FAIL
  Flex test: PASS / FAIL
  Issues: ________________

FINAL NOTES (after use):
  _______________________
Notebooks get lost. Spreadsheets get complicated. That's why BladesmithHub exists — a tool to log heat treatments in 30 seconds from your phone, then search by steel type, results, or date when you need to repeat something.
Next Steps
You now have the foundational knowledge for successful heat treatments. Here's how to continue:
- Start with 1084 — It's forgiving and teaches fundamentals without punishing mistakes
- Make test pieces first — Heat treat scrap before risking a finished blade
- Keep detailed records — Future you will thank present you
- Join communities — r/Bladesmith and r/knifemaking are incredibly helpful
- Learn one steel deeply before jumping to the next
- Invest in temperature measurement — A $25 thermocouple pays for itself after one saved blade
Further Reading
Books I recommend:
- The Complete Bladesmith by Jim Hrisoulas — The bible for new bladesmiths
- The Master Bladesmith by Jim Hrisoulas — More advanced techniques
- Step-by-Step Knifemaking by David Boye — Great for beginners
Online resources:
- Knife Steel Nerds by Dr. Larrin Thomas — Deep metallurgy made accessible
- New Jersey Steel Baron — Steel specs and heat treat data
- ABS Bladesmith School — For serious study
Conclusion
Heat treatment transforms your work from shaped metal into a functional tool. It's both science and craft — understanding the principles matters, but so does practice and observation.
Remember:
- Normalize to prepare the steel (2-3 cycles)
- Austenitize to the correct temperature for your steel (verify with magnet)
- Quench quickly in the right medium (edge first, keep moving)
- Temper twice at appropriate temperature for your intended use
- Document everything so you can repeat your successes
Every blade teaches you something. Keep records, stay consistent, and don't fear failures — they're your best teachers.
Many bladesmiths find that keeping detailed records transforms their craft. BladesmithHub was built for this purpose — quick logging from your phone, searchable history by steel or result.
Related Articles:
- 1084 Steel Heat Treatment Recipe — My exact process for this beginner-friendly steel
- 80CrV2 Heat Treatment Guide — A step up in complexity and performance
- Why Every Bladesmith Needs a Heat Treat Log — The case for documentation
- 5 Reasons Your Blade Cracked — Troubleshooting guide